To get a Disqus shortname, you need to create a Disqus account and register a new site. The shortname is a unique identifier for your Disqus-powered comment section. Here's how you can get it:
Steps to Get a Disqus Shortname
1. Create a Disqus Account
- Go to the Disqus website.
- Click on "Get Started" or "Sign Up".
- Create an account using your email, Google, or Facebook.
2. Register a New Site
- After signing in, click on "I want to install Disqus on my site".
- Fill in the required details:
- Website Name: Enter the name of your website (e.g., "My Blog").
- Disqus URL: This will be your shortname (e.g., myblog.disqus.com). Choose a unique and memorable name.
- Category: Select the category that best describes your website (e.g., Technology, Lifestyle, etc.).
- Click "Create Site".
3. Get Your Disqus Shortname
- After registering your site, you'll be redirected to the Disqus setup page.
- Your shortname is the unique identifier you chose during registration (e.g., myblog).
- You can also find it in your Disqus dashboard under Settings > General > Shortname.
4. Configure Disqus for Your Website
- Disqus will provide you with a code snippet to integrate into your website.
- Example code:
1. Store the Shortname in the .env File
Add the Disqus shortname to your .env file:

Replace your_shortname with your actual Disqus shortname (e.g., myblog).
2. Add the Shortname to config/services.php
Open the config/services.php file and add the Disqus configuration:

This allows you to access the shortname using config('services.disqus.shortname').
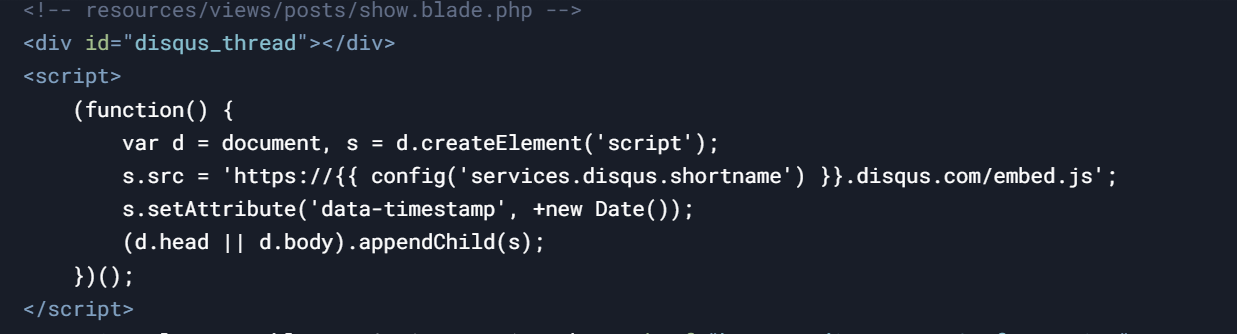
3. Use the Dynamic Shortname in Your Blade Template
Update your Blade template (resources/views/posts/show.blade.php) to use the dynamic shortname